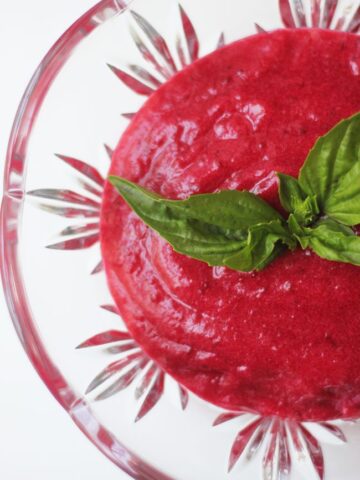
Ah, cranberry sauce. What Thanksgiving dinner is complete without it? I LOVE homemade, whole cranberry sauce. However, some individuals in my family (you know who you are) prefer that corn syrup-laden goop out of a can. Ugh. Don't get me wrong, I'll eat it if you put it on my plate. But something just seems so wrong about serving anything out of a can on Turkey Day, especially since you can make it so easily right in your own kitchen. Add some fresh raspberries or a shot of Chambord for a bit of raspberry flavor, and if you prefer your sauce with whole cranberries you can just skip the food processing step.
Super Simple Homemade Cranberry Sauce
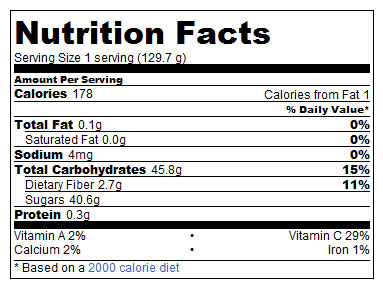
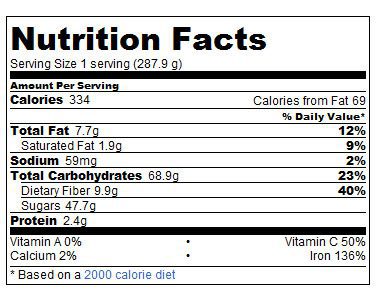
makes 6 servings
¾ cup 100% cranberry juice
¼ cup freshly squeezed orange juice (juice from about one 1 orange)
1 cup sugar
12 oz bag fresh cranberries
Combine juices and sugar in a medium saucepan, and bring to a light boil. Add your cranberries, bring to a boil, then lower to a simmer. Continue cooking about ten minutes, until the cranberries have popped (you'll want to keep your pot covered during this time).
If you prefer whole cranberry sauce, you can now let the mixture cool, then pour into your mold or bowl and refrigerate. If you prefer smooth sauce, let your mixture cool, puree for 2-3 minutes (until smooth) in your food processor, then refrigerate in your mold or sauce. Refrigerate for at least two hours, preferably overnight.